Firestick is a widely used streaming device all around the world. It has more features to let you access the content in good quality. Taking a screenshot has become a habitual activity nowadays among people. People take screenshots of some important messages, call logs, and more. The methods to take screenshot depends on the device you use. There is no dedicated feature o take a screenshot on Amazon Firestick. But there, walk around to take a screenshot on your Firestick. Yes, you can use the Apps2Fire and adbLink apps to take screenshots on your Firestick. You need to install these apps on your Android Smartphone or computer to take a screenshot on Amazon Fire TV Stick.
Important Message
Your IP is Exposed: [display_ip]. Streaming your favorite content online exposes your IP to Governments and ISPs, which they use to track your identity and activity online. It is recommended to use a VPN to safeguard your privacy and enhance your privacy online.
Of all the VPNs in the market, NordVPN is the Best VPN Service for Firestick. Luckily, NordVPN has launched their Exclusive Christmas Deal at 69% off + 3 Months Extra. Get the best of NordVPN's online security package to mask your identity while streaming copyrighted and geo-restricted content.
With NordVPN, you can achieve high streaming and downloading speeds, neglect ISP throttling, block web trackers, etc. Besides keeping your identity anonymous, NordVPN supports generating and storing strong passwords, protecting files in an encrypted cloud, split tunneling, smart DNS, and more.

How to Take a Screenshot on Amazon Firestick [Android Smartphone]
You can use your Android smartphone application, to take a screenshot on Firestick. Before going into the steps, turn on adb debugging on Firestick.
Turn on ADB Debugging
- Pair Firestick remote to the TV and navigate to the Firestick home screen.
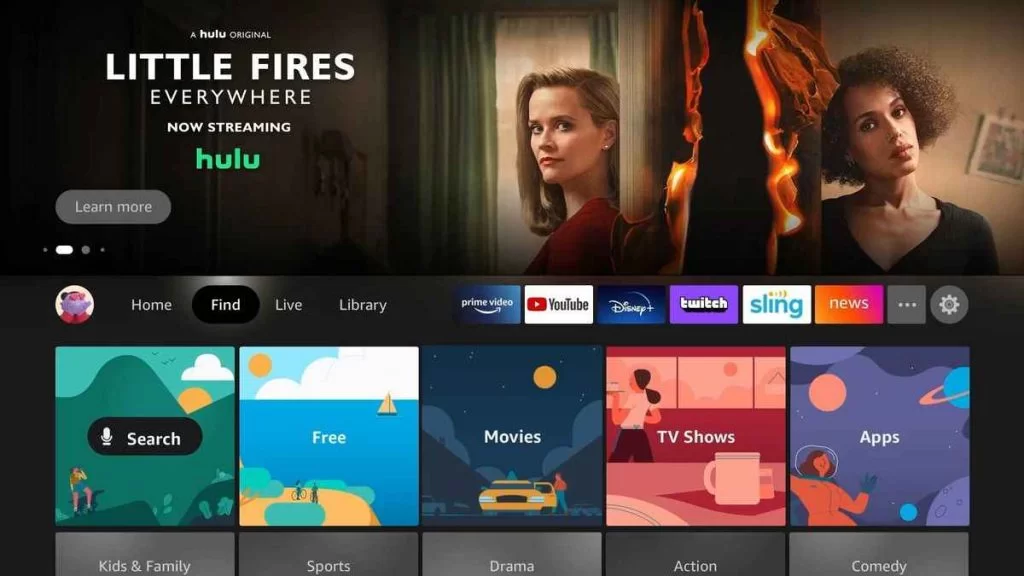
2. Click the Settings icon on the top-right corner.
3. On the Settings screen, select My Fire TV.
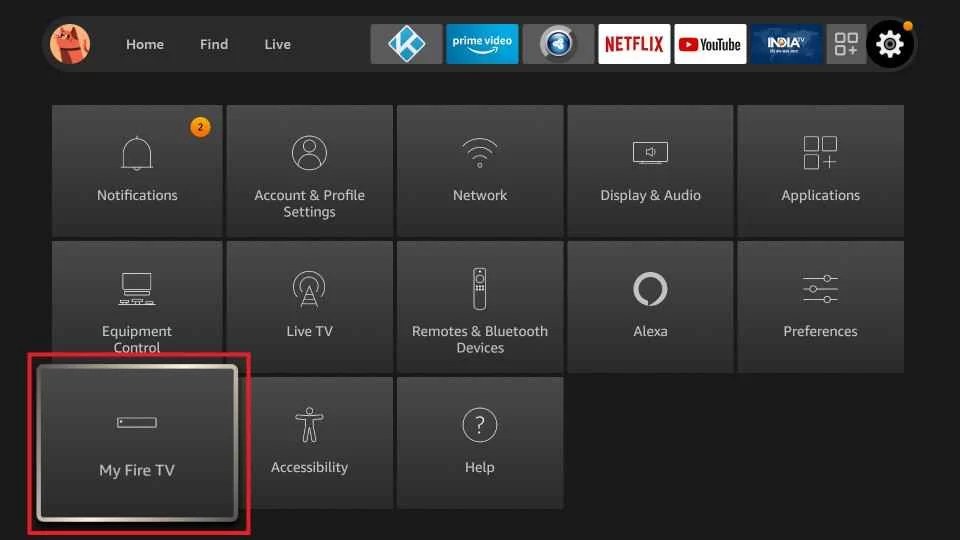
4. Tap the About option.
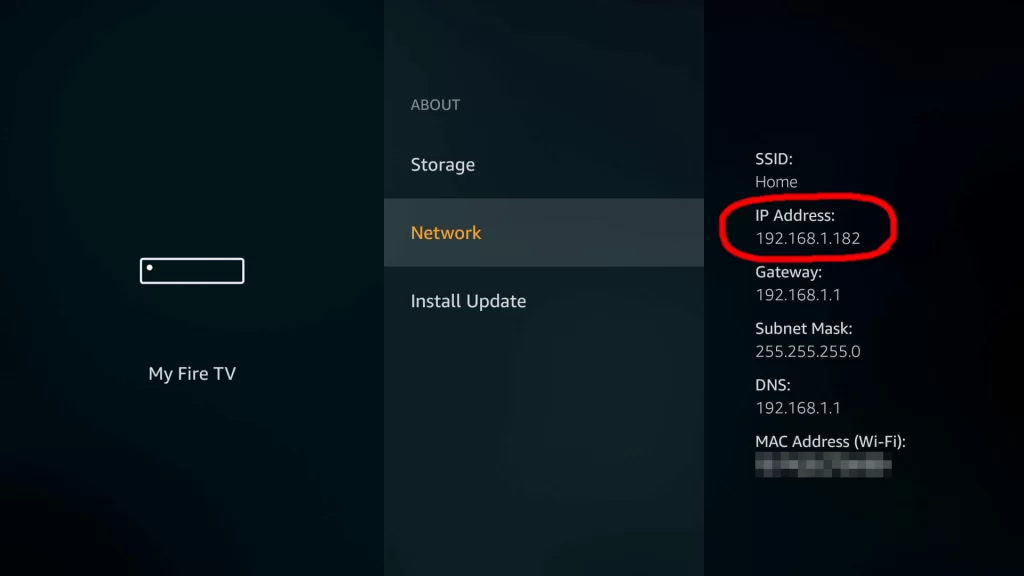
5. Scroll down and click Network.
6. Write down the IP address that you can find on the right side.
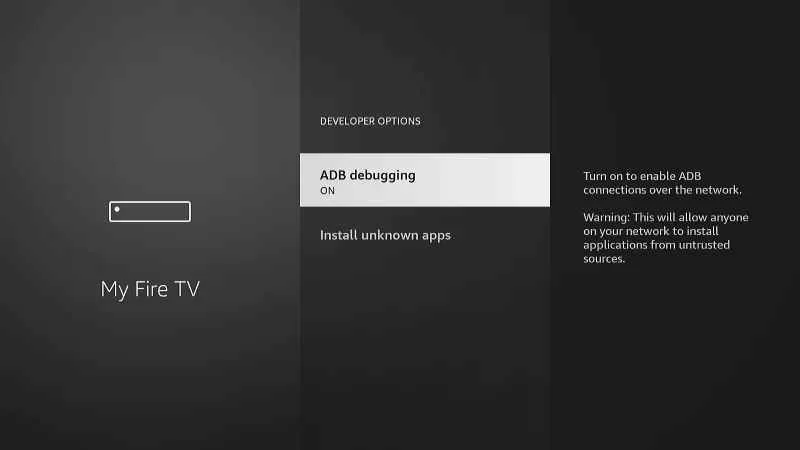
7. Now, select Developer Options under My Fire TV.
8. Finally, turn on ADB Debugging.
Steps to Take a Screenshot on Amazon Fire TV Stick
Make sure to connect your Firestick with a Wi-Fi network and your phone with the same network.
1. Initially, unlock your Android mobile and navigate the Google Play Store.
2. Enter Apps2Fire in the Search bar using the on-screen keyboard.
3. Select the app from the search results.
4. Click the Install button to install the app on your device.
5. Once the installation process is over, launch the app.
6. Tap the three-dots icon and select Setup from the menu.
7. Enter the IP address you note down and hit the Save button.
8. Now, the Apps2Fire app will be connected to the Firestick device.
9. Tap the more (three-doted) icon and select Screenshot from the menu.
10. Now, click the Ok button to take a screenshot.
11. Once the screenshot is taken successfully, the screenshot file name will appear on the screen.
12. Write down the filename and click OK.
13. Now, go to the Fire TV SD Card section in the Apps2Fire app.
14. Search the screenshot using the file name.
15. Once you find it select the file and tap the Download button.
16. The downloaded screenshot file will be saved on your phone.
17. Navigate to the File Manager to see the screenshot.
Note: You can install the Easy Fire Tools app to take a screenshot of your Firestick.
How to Take Screenshot on Firestick using a Computer
Like the previous method, you need to enable ADB Debugging and write down the IP address of your Firestick to take a screenshot using a computer or PC.
1. First, connect your PC and Firestick device to the same Wi-Fi network.
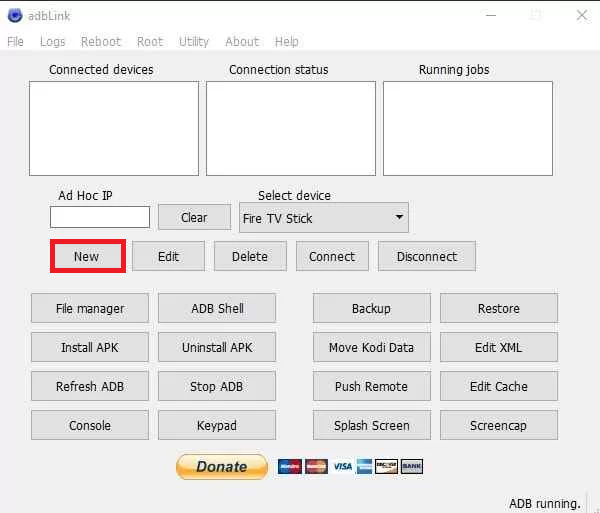
2. Install and run the adbLink software on your PC.
3. Next, click the New button.
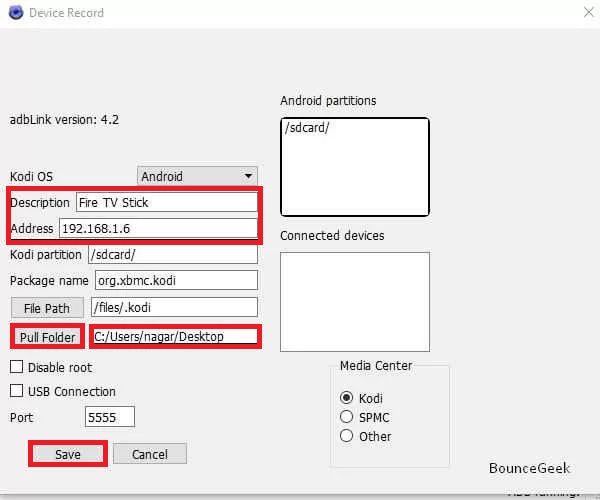
4. Now, a new window will appear on the screen.
5. Type Fire TV Stick in the Description field and IP address in the Address field.
6. Click the Pull Folder button and select the location to save the screenshot file.
7. Once you enter all the details, tap the Save button.
8. Next, click the Connect option.
9. Now, the USB Debugging permission will pop up on the Firestick-connected TV screen.
10. Tap the Ok button to give permission.
11. The Firestick device is connected to the adbLink software.
12. Move to the Firestick location where you want to take the screenshot.
13. Now, hit the Screencap button in the adbLink app to take a screenshot on Firestick.
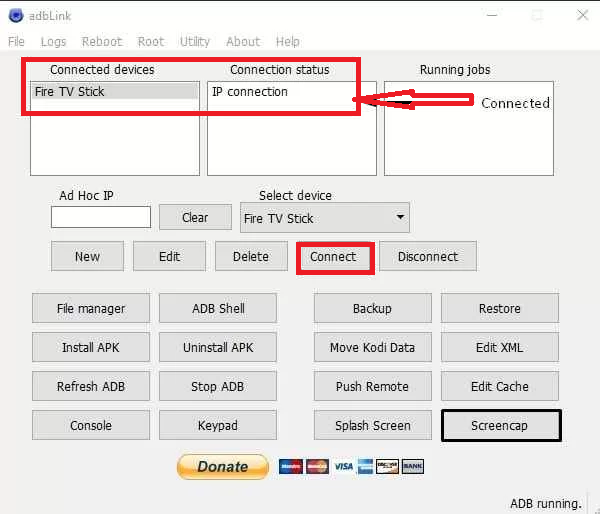
14. Once the screenshot is taken, a pop-up menu will appear on the screen.
15. Click Ok and find the screenshot in the selected location.
How to Take Screenshot using Minimal ADB and Fastboot Tool
Below are the steps to take a screenshot on Firestick using the Minimal ADB and Fastboot tool on your PC.
1. Initially, install the Minimal ADB and Fastboot Tool on your PC.
2. Run the ADB Tool from the shortcut.
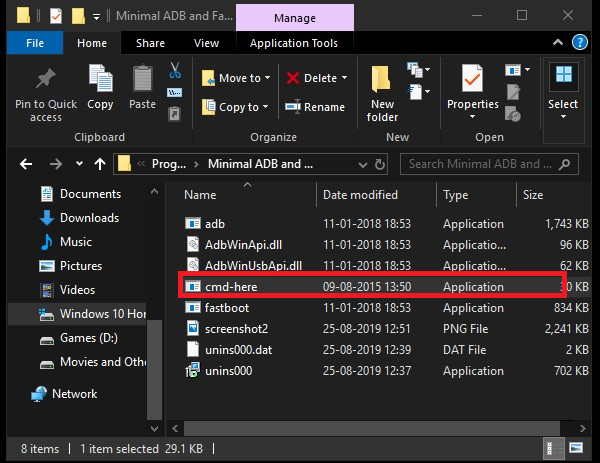
3. Now, open the command window and enter the following command.
adb connect xxx.xxx.x.x ( Replace xxx.xxx.x.x with your Firestick TV Stick IP address)
4. When the USB Debugging permission appears on the screen, tap the Allow button.
5. Next, make sure your Firestick is connected to ADB by running the following command.
adb devices
6. Take the screenshot using the commands.
adb shell screencap -p /sdcard/filename.png
adb pull /sdcard/ filename.png
7. Now, locate the Minimal ADB and Fastboot installation folder.
8. Finally, you can find the screenshot here.
You can follow any of the above methods to take a screenshot on your Amazon Firestick. There are also other third-party apps, such as the Easy Fire Tools app, that you can use to take a screenshot.
Frequently Asked Questions
There is no option to take a screenshot on Firestick, but sill you can do that using your Android mobile and computer.
Yes, you can screen record on your Firestick.
The green screen appears on Firestick due to the usage of inferior cables, ugs, and errors nesting in the TV.
