Key Notes
- You can change the DNS address on your Fire TV Stick from the Settings menu.
- Change DNS: Settings → Network → Choose the connected WiFi → Forget this network → Advanced → IP Address → Network Prefix Length → Enter DNS Address.
Fire TV or Fire TV Stick can be connected to both wired and wireless connections. But, sometimes, you might face issues while connecting your Firestick to WiFi. In that case, you need to change the DNS settings on your Firestick. You can use the public DNS of Google, such as 8.8.8.8 and 8.8.4.4. Further, if you wish, you can also use the Smart DNS on your Firestick. When you use a smart DNS with a VPN, it will automatically redirect your DNS requests, and the VPN server will set the preferred location. So that you can easily unblock geo-restricted content on your Amazon Firestick.
How to Change DNS on Amazon Fire TV Stick [Wireless]
1. Go to the Settings menu and click the Network option.
Important Message
Your IP is Exposed: [display_ip]. Streaming your favorite content online exposes your IP to Governments and ISPs, which they use to track your identity and activity online. It is recommended to use a VPN to safeguard your privacy and enhance your privacy online.
Of all the VPNs in the market, NordVPN is the Best VPN Service for Firestick. Luckily, NordVPN has launched their Exclusive Christmas Deal at 69% off + 3 Months Extra. Get the best of NordVPN's online security package to mask your identity while streaming copyrighted and geo-restricted content.
With NordVPN, you can achieve high streaming and downloading speeds, neglect ISP throttling, block web trackers, etc. Besides keeping your identity anonymous, NordVPN supports generating and storing strong passwords, protecting files in an encrypted cloud, split tunneling, smart DNS, and more.

2. Next, choose your WiFi network and press the Menu button on your Firestick remote.
3. Select the Forget this network button.
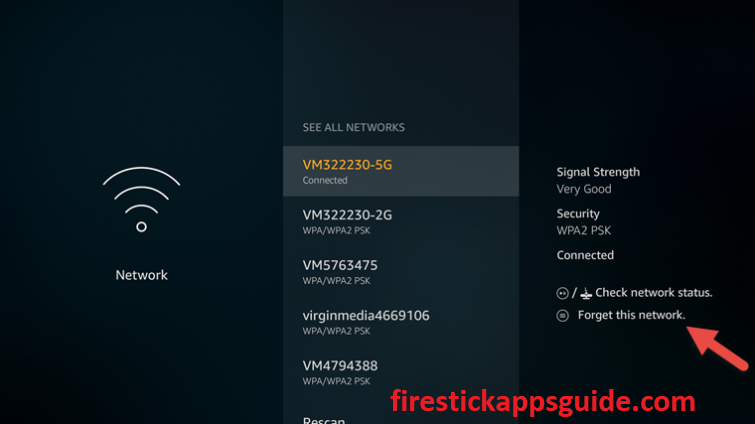
4. Now, choose a WiFi network and type the password.
5. Once entered, tap the Advanced button on the onscreen keyboard.
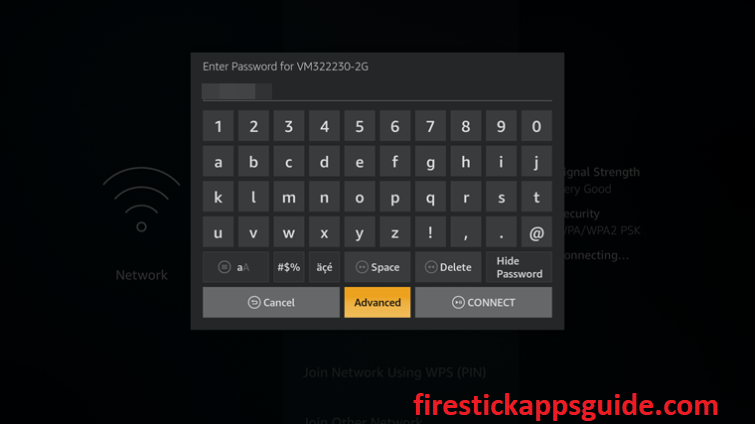
6. Type your IP address and followed by the gateway number.
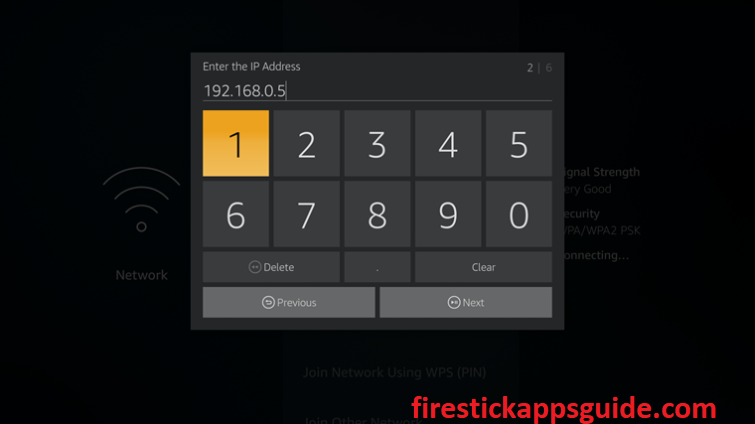
7. Now, you need to enter the Network Prefix Length. If your Subnet mask is 255.255.255.0, you need to enter 24 or if your subnet mask is 255.255.255.255, you need to enter 32 in the given field.
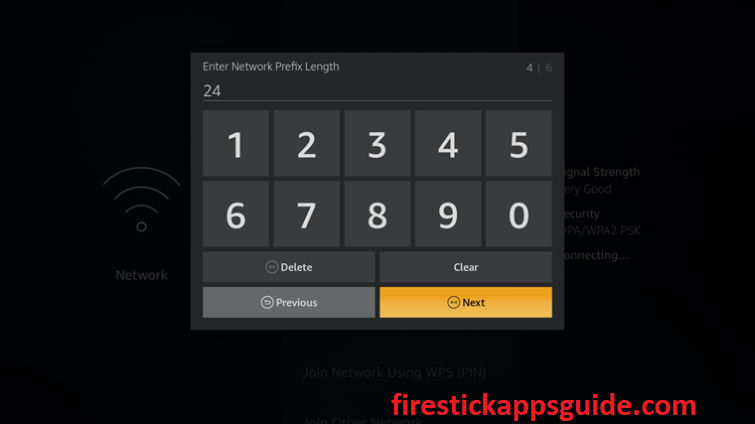
8. If you find any other value you can use the Subnet Calculator tool to calculate the number.
9. You need to type the primary and secondary DNS addresses.
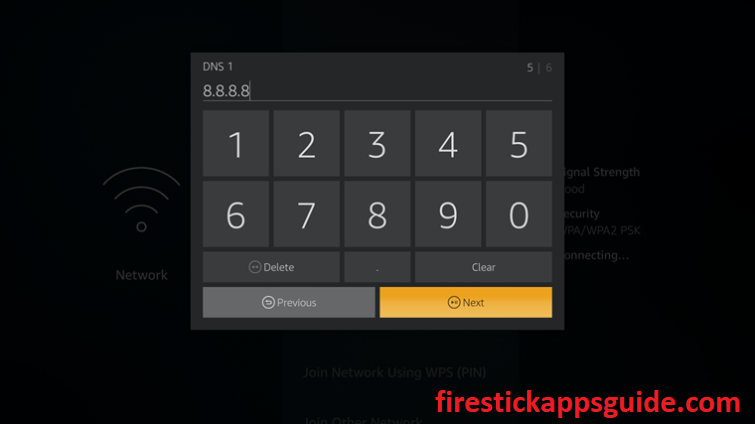
10. That’s it, you have successfully changed the DNS on your Firestick.
How to Change DNS on Firestick [Wired]
1. Connect your Firestick to a wired WiFi connection. Then, navigate to Settings on your Fire TV Stick.
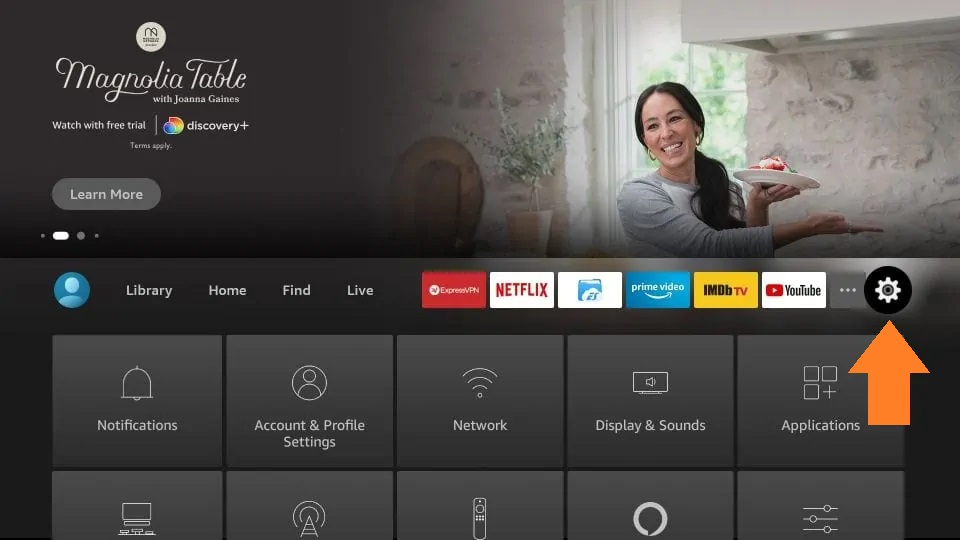
2. Select System and click the Network option.
3. Next, choose Configure Network.
4. Enter the IP address of your home network.
5. Now, set the prefix length as 24 and click the Next button.
6. Type the Gateway of your router IP and tap Next again.
7. Set DNS 1 as 212.32.240.145 and hit the Next button.
8. Set DNS 2 as 104.200.137.81 and click the Next button.
9. The DNS address will be changed.
Advantages of Changing DNS
In Firestick and all the smart devices, your ISP will keep track of your activities and may throttle your connection. So changing the DNS will help you with the issues mentioned below while streaming.
#1. The primary advantage of changing the DNS is to improve the connection speed. Because an ISP is providing you with a server that is used by many people. If many are using the server at the same time your internet speed slows down automatically. So it is good to connect to a server with less ping that will improve your connection speed.
#2. Some streaming services available on Amazon Firestick are geo-restricted. If you want to access those location-specific content, you can use Smart DNS services such as IPVanish VPN and Express VPN on Firestick. The Smart DNS changes your location and lets you stream content that is not available in your region from where you are.
How to Check if the DNS is Changed on Amazon Firestick
1. Launch the Firestick home screen and click the Settings icon on the top right corner.

2. Select the My Fire TV tile on the Settings screen.
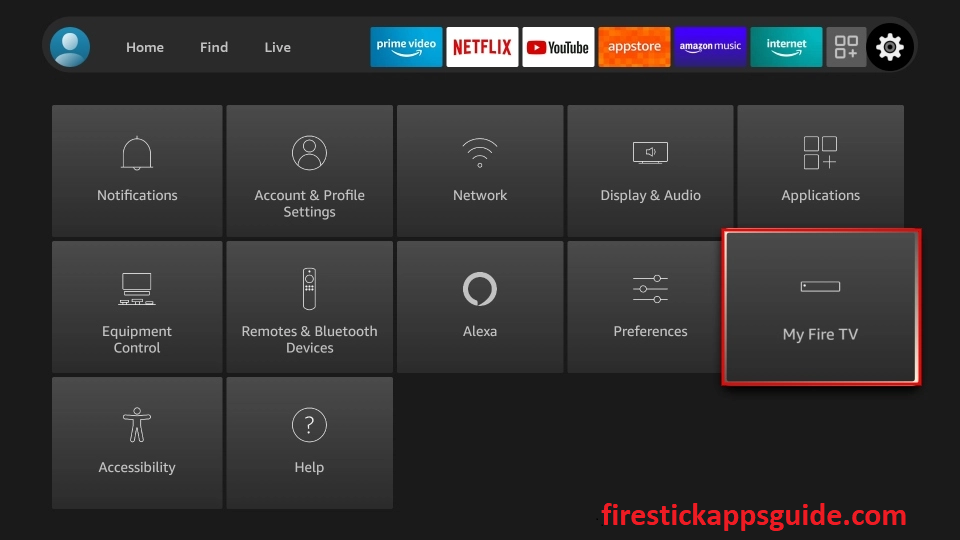
3. Tap the About option and choose Network.
4. Here you can find your Firestick’s IP address, Gateway, Subnet mask, and the changed DNS address.
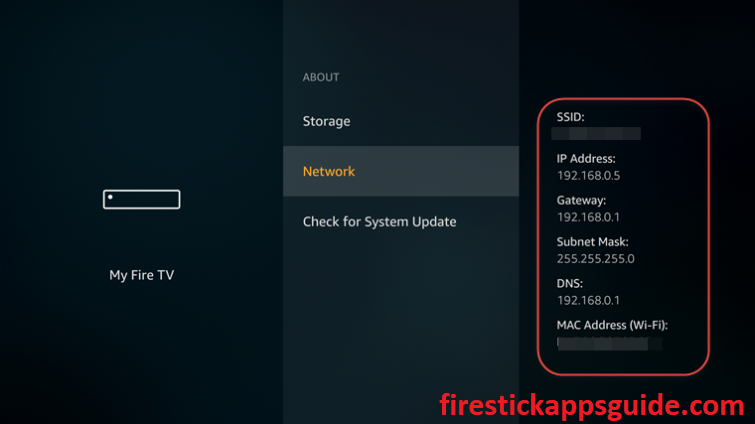
To make sure the DNS changes are working, you need to go to ipleak.net on the Silk browser on Firestick. There you can find the DNS server settings under DNS Address detection.
Frequently Asked Questions
Yes, all the premium VPNs offer DNS servers as a built-in feature. You can choose any of the best VPNs for Fire TV Stick to change the DNS address.
